How to Replace Gas Lift on Office Chair?
How to replace gas lift on office chair. Gas lift in office chairs allows you to adjust the height of the chair according to your comfort. It consists of a cylinder that is filled with compressed gas, typically nitrogen gas. The cylinder changes the height of the chair by adjusting the amount of gas stored in it.
However, If the gas lift of your office chair is no longer working efficiently and sinks to the bottom whenever you sit on it, it needs to be replaced. Now don’t always choose to replace an office chair altogether without looking into ways for fixing the problem. Below, we will guide you on how to remove the gas lift from the office chair, so keep reading!
How to Replace Gas Lift on Office Chair?
As you completely understand how does gas lift works in office chairs. So, removing gas lifts is pretty simple if you have the right tools and techniques. So without wasting any time, let’s jump directly into the process of removing the gas lift from the office chair.
Step 1: Inspect the Existing Gas Lift
Before rushing towards removing the office chair cylinder, it’s better to inspect the existing gas lift. This would let you know if the gas lift is faulty or not. While inspecting your pneumatic cylinder, keep the following points in mind:
- Check for the lever of your chair and make sure it’s not too tight or too loose.
- Check the screws of the gas cylinder. If they are loosened, tighten them using a screwdriver.
- Also, check the lock on your cylinder head to ensure it works smoothly.
If any of the above-mentioned components are not faulty, then maybe it’s time to remove and replace the gas lift for better functioning. The equipment needed and the steps to be followed for this purpose are given below:
Step 2: Gather the Gas Lift Removal Tools
Having the right tools available to you decreases half of the burden of a difficult task. So start the process of removing the gas lift of the office chair by gathering the right tools. The tools required for this purpose are easily available and simple to use as well. Here is the list:
Screwdriver
Required for tightening or loosening the bolts.
Wrench
Required removing the gas lift by fastening the top of the gas lift and then twisting it.
Protective Gloves
Gloves are not necessary, however, it is a useful option to protect your hands.
Lubricant
Required for lubricating the casters, base, and gas lift if necessary.
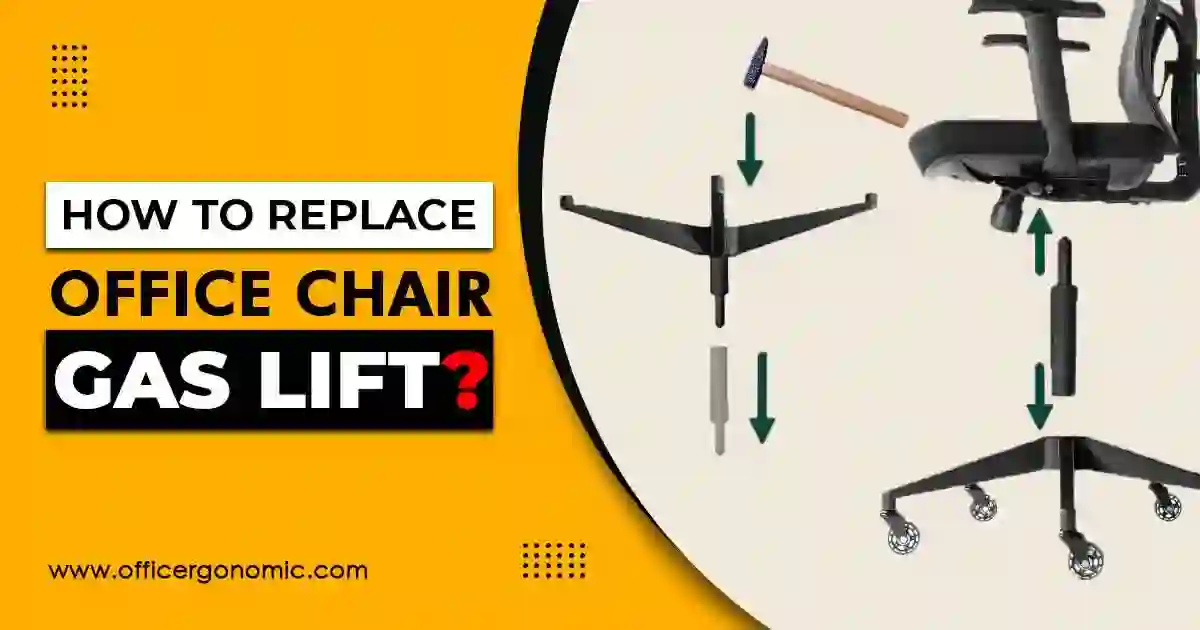
Rubber Mallet or Hammer
A rubber mallet would help in removing the base of the chair. You can also use a hammer for this purpose. However, rubber mallets are safer as they have a softer head made of wood or rubber to avoid any crush or wear or tear on the chair.
These tools are present in every house, so check for them first in your homes. However, if any tool is missing, you can easily purchase it from a nearby hardware store.
If you are finding any difficulty in doing the task, ask someone to help you out. Once you have arranged all the necessary tools, it’s time to jump into the procedure of removing the gas lift.
Step 3: Turn the Chair Upside Down
Turn the chair upside down so that you can easily remove different components from it. When the chair is in an inverted position, the base of the chair is exposed to you and you can easily repair its different components.
To protect your chair from any scratches or damages, it’s better to invert the chair on a rug instead of a bare floor.
Step 4: Remove the Casters (Optional)
Next, you have two options. You can either remove the base directly or remove it in two steps by first removing its wheels and then going to the base. The latter is safe as it protects the wheels or casters from any damage.
Removing casters does not require any tools or a complex procedure; you just have to pull the wheels firmly to remove them.
For a better grip over wheels, wear gloves and then pull them out. If the wheels are not easily coming out, apply some lubricant such as WD_40 to them or use a screwdriver to pry the caster out of its socket.
Step 5: Remove the Base
For removing the base, take the rubber mallet and gently tap the base. After a few strikes, the base would be removed. However, if it fails to remove the base, then gradually increase the pressure on the seat using the same mallet. Keep on tapping the base until it is removed.
Step 6: Remove the Gas Lift
Now the gas lift is exposed to you and you can easily remove it. Use a regular wrench or a pipe wrench and tightly clutch it on the top of the gas lift. Afterward, twist the gas lift and loosen it. Once the gas lift is completely loosened, carefully pull it up to remove it.
Step 7: Buy a New Gas Lift Replacement
Once you have successfully removed the gas lift cylinder, it’s time to replace it. Find a suitable replacement cylinder to replace the old one. Gas lifts are easily available online and in stores.
Choose one that suits your chair’s dimensions. For this, accurately measure the gas spring diameter, column diameter, and gas lift stroke so that you can buy the right one.
Step 8: Replace the Gas Lift
The last step involves installing the new gas lift in the office chair. You just have to take the new gas lift and place it in the socket with your hands. However, if it doesn’t successfully install using hand force, use a rubber mallet to increase force so that it fits in well. Make sure that it has a tightly secured place.
Step 9: Reassemble the Chair
Once you are satisfied with the installation of the gas lift, reassemble your chair. Fix the chair base and hydraulic cylinder into the chair mechanism, they will faster on their own. You can also use a rubber mallet to gently apply force on it to ensure that it firmly grasps its position.
In case, you have also removed the casters, carefully reattach them as well. After replacing the gas lift of your office chair, you would surely observe that the sinking problem of your chair is resolved. You would feel more comfort and relaxation while sitting on the chair.
Last Thoughts!
In short, almost all of us experience a sinking office chair at one point in our lives. This is simply because the seals on most office chairs fail over the years because they can’t maintain the constant pressure required to raise or lower the chair with the help of chair cylinders.
If your chair’s warranty period has ended, it’s time to get a new chair, but if it’s new and you face this issue, there are ways to fix the problem. Replacement cylinders can help you get rid of sinking chairs.


